

This comprehensive guide will show you how to design a course in 17 steps. Course design can be quite complex. Not only you need to know your content, you also need to know how to teach it, how to keep your learners excited and how to make your own life easy.
With more than a decade of experience, I have compiled a set of easy to follow guidelines along with case studies to show you how to approach your own course design.
You are a subject matter expert and have a task ahead of you: how to design a training course. You have some content in mind, but you are not quite sure what areas to include, what sequence to go through or even where to start.
Because there are so many things you need to consider, it can suddenly feel overwhelming. The task feels immense. This can be off putting to many and it is inevitable that some resistance and procrastination kicks in.
In this guide, I will give you a design system—a strategy. My aim is to make the process of course design easy and approachable and I want you to end up with a course that is as simple and fun to deliver as is impactful.
The strategy presented here is not very hard to follow; the challenge is to remember to include the right things at the right time. Forget a priority, delve too far into course design and you may suddenly find yourself in a situation where you have to throw away everything you have designed so far and start all over again. No one wants this; I know, because I have been there myself!
Here, I want to help you avoid this inefficiency by giving you a proven course design system that will get you solid results.
I have been involved in course design at Skills Converged for more than a decade including the design and delivery of Train the Trainer courses. Here, I will be sharing with you my expertise in approaching course design, because nothing makes me happier than you ending up with a useful, entertaining course that doesn’t take a great chunk of your time to design.
The Scope of this Guide on Training Course Design
Here, we are mainly focusing on the design of short-term adult courses that take place over one or a few days. This guide helps with teaching courses such as soft skills, management, software, crafts, photography, painting and similar. Such courses are immensely popular and act either as taster of a new subject, a new hobby or an opportunity to get more skilled in a niche topic.
The course design guide can also be applied to sport courses such as skiing, windsurfing and mountain biking because the principles are exactly the same for all such short course. These kind of courses are usually run over a day or two, or in the case of hobbies, most often in the form of 2-3 hours on a weekly basis.
This guide will help with the design process of such courses so that you end up with something your students love and want to recommend to their friends and family. Everyone wins!

Systematic Course Design with an Example
Right, let’s get to it. As you may know, I am an advocate of teaching by example. It is so much easier to see how something works when you have an example to relate to. For the purpose of this training guide, I have chosen the example of teaching photography. I have chosen photography, because these days everyone is a photographer and so the subject is rather mainstream and familiar. Whatever your domain, it would be easy to follow what happens in a photography course and you can map that to your own courses as I explain various guidelines.
Here is the scenario we are going to consider throughout this guide:
Example Case Study
You want to design a one-day studio photography course. You have a number of areas in mind to cover. You want delegates to learn about the main features of a DSLR camera. You are also going to have a model. You want students to learn to pose a model, shoot her from various angles and adjust the camera based on various lighting.

Note that when I am presenting the photography example, I focus mainly on strategies used when designing the example course. I am not going to delve into actual details required for a photography course, because it would distract us from the main guide. I will present you what you can do for the case study on a rather high level so you can see how the specific guideline is applied and how you can do the same for your own courses.

1. Approach with Proven Training Techniques
When you know a topic well and are excited about teaching it, it is very tempting to dive in headfirst and create a course based on however you ‘feel’ a course should be delivered. There are two sources for this ‘feeling’:
- The type of training you have already received on your specific topic.
- Your dislike of any other training course you attended in the past which you want to avoid.
Sounds kind of logical to start there, but this can quickly lead to failure and a suboptimal approach. Let me explain.
Copying the type of training you have received is limiting because, first it may not be good enough, it is just that you attended it and it was ok, there could be much better ways of delivering a course that you don’t know.
Now, for avoiding doing what other bad trainers did, you could be assuming everyone learns like you which we all do unconsciously. The teaching of that course wasn’t suitable to your learning style and that’s why you didn’t like the course.
Most people, including experienced trainers fall for this. It is a fundamental principle in training, that people have different learning styles. There is a debate on exactly what system can be used to categorise people into various learning styles, but that is more to do with preference and fashion.
The key point I want you to always remember is that people learn differently and if you offer them the kind of training you like to receive yourself, it may not be good enough. We will revisit learning styles later in this guide.
Ok, let’s stay focused on course design. To avoid favouring only a specific learning style, it is best to follow an established approach—one that is supported by research. For this, consider two key areas that have become enormously influential in the past few decades in the training industry. These methodologies make courses much more interesting and educational. They are:
- Facilitation training
- Accelerated learning
Apply Facilitation Training
Facilitation training sits in contrast with lecturing. It is two-ways, not one way. You are not the source of all information, instead you are there to help learners discover on their own and each other and also from you. A facilitating trainer uses lots of exercises, engages delegates constantly, asks them questions and checks to ensure they are learning. If you want to learn more on how facilitation skills is carried out and to practice it, come to my Train the Trainer: Core Skills course.
Apply Accelerated Learning
In addition to facilitation training, consider appealing to all senses. Rather than relying only on words, aim to maximise information transfer by appealing to all senses. We have a guide, “Accelerated Learning Principles”, which is included in the free training package that you receive when you subscribe. For even more information on this topic consider reading the excellent book, “The Accelerated Learning Handbook” (Meier 2000).
Example Case Study
Apply facilitation training to the photography course:
- Avoid delivering a lecture about using a camera. Instead get the delegates to use a camera in various exercises with specific objectives.
- Put the delegates in groups so they can shoot and learn from each other.
- Get the delegates to compare their pictures with each other and with yours as the trainer. You should also show samples by master photographers and get them to critique it themselves based on the guidelines covered in the course.
- Set up discussion sessions to explore what works and what doesn’t.
Example Case Study
Apply accelerated learning to the photography course:
- Immerse the delegates in the course by using a photography studio that has professional lighting, props studio equipment, etc.
- Hire and use a model.
- Get delegates to bring their own cameras so whatever they learn in the course can be applied immediately.
- Get delegates customise the studio by setting up lights, backdrops, tripods and the scene. These activities will make the experience more sensory and memorable.
- Share printed photograph books, in addition to digital photos, to increase tactile sensing. Show images on tablets rather than just on a TV screen. With the tablet, delegates get to swipe and zoom which adds sensory interaction.
Instructional Methods
Having explored facilitation training and accelerated learning, you will then have a choice of using the instructional method to serve the purpose of training. There is a variety of methods available based on teaching styles and learning styles. See our comprehensive guide on instructional methods for more details.
2. Follow Course Design Methodology
Most trainers approach course design like writing assignments. Designing a course is however different from writing an article or a book. The standard recommendation for articles and papers is to write the introduction and the conclusion first and then concentrate on the body. You are to focus on what you want to share before embarking on writing the bulk of it.
This is all good, but when it comes to course design you cannot use the same method. In a book, you impart some knowledge and hope for the best. In a training course, your purpose is different. You need the delegates to learn.
You must therefore start with defining what would they be able to do after the course. The ‘doing’ is the keyword here; a training course is about doing, not just knowing. If I want to know something, I read a book, I listen to a lecture, I watch a video; but if I go to a training course I want to be able to do something by the end of it.
So when you start the design process, ask yourself, what is it you want the delegates to learn and be able to do after your course.
Work Back from What They Should Be Able to Do
To figure out what to put into your course, work backwards:
TASK 1:
First, identify what delegates need to be able to do after the course.
TASK 2:
For this, what areas should they learn about?
TASK 3:
To learn those areas, what topics need to be covered in succession?
TASK 4:
To practice those topics, what exercises should they go through?
TASK 5:
Before going through an exercise, what should delegates know, including theories or safety related content?
Concept First, Presentation Later
Now, when it comes to designing a course, the tendency I have seen is to promptly fire up Power Point and start designing slides! Or start browsing on YouTube, Pinterest and the like to decide what videos and images to show.
This is no good at all.
Why? Because you immediately have to make decisions on aesthetics and the visual design of some slides or photos, when at this point all of your focus should be on your goals and the topics you want to include. You should be thinking, “What do I want them to learn?”, and, “What’s the easiest way to teach them?”. The slides will hamper your process.
Instead, what you need to do is to use a system that helps you collect ideas without forcing you to make decisions on aesthetics. You want to avoid that until the very end when you know more about what your content is going to be.
Let me share an analogy to make this absolutely memorable. Say, you have an idea for a board game and you want to design it. Would you start the process by designing the artwork, graphics and the fine art painting for the large map, or would you instead focus on the mechanics of the game? Is it not more important to start with how the game plays rather than focusing on aesthetics?
You can just use substitute cards, tokens and coins from other games and use some simple hand drawing to produce the resources you need and then quickly focus on the core ideas. This is what I want you to remember just before you start; hold back on artwork design for as long as you can and focus instead on the mechanics of teaching and learning. You will end up with a much better course and save yourself tons of time.
Example Case Study
TASK 1: First, identify what delegates need to be able to do after the course.
DESIGN 1: Pose a mode in the studio under controlled lighting and take a quality portrait photo,…
TASK 2: For this, what areas should they learn about?
DESIGN 2: Posing the model, using the camera, choose lighting, lighting setup,…
TASK 3: To learn those areas, what topics need to be covered in succession?
DESIGN 3: Composition, camera lens, optics, lighting devices, light measure,…
TASK 4: To practice those topics, what exercises should they go through?
DESIGN 4: Shoot a still life under pre-set lighting, shoot under custom lighting, controlling the light entering the camera through camera settings,…
TASK 5: Before going through an exercise, what should delegates know, including theories or safety related content?
DESIGN 5: Review sample of expected quality results taken in this studio, safety regarding handling lights and studio equipment, composition theory, lighting theory,…
3. Gather Ideas
Having established your approach, the next step is to gather all the ideas you have about this course. You already have a vision of the course. This is the moment to write it all down and crystallise it. A great way to do this is to use a mind map, which is what I use every single time I design a course. It is without exaggeration, one of the most powerful tools ever made for anyone engaged in creative design.
The worst way to approach the design process is to make a straight-forward list of ideas. It has been shown by researchers such as Tony Buzan that list making is a limited approach by nature and will actually stop you from coming up with more ideas as you add items to the list.
I am not going to use this space to walk you through the mind mapping process, as there are many excellent guides on the net you can use. Start with the following:
The power of mind mapping is in recategorization and association. Use a software tool to get the full benefit; pen and paper mind mapping is not good enough because you cannot quickly reconfigure the map.
First, list all ideas and topics you want to consider for the course and as more are added, divide them into hierarchies. Each high-level node can then lead to lower level nodes as you structure the content of the course. Your mind map should become a repository of information and ideas.
Mind mapping has one powerful feature; it prevents you from focusing on aesthetics. You are not designing the slides or the handouts that the delegates will see. This will therefor free you up from thinking about them and instead allows you to focus on the teaching and learning tasks.

While mind mapping and gathering ideas think of the following three areas:

What You Want
- What topics are good for my delegates to learn in this course?
- What do I want them to be able to do after the course?
- Where does this course fit in the range of courses I offer?
What Your Delegates Want
- Who is my audience?
- What do they already know before coming to the course?
- What do they expect to get from such a course?
What Others Want
- What topics other similar courses cover that I must also include?
- What topics can I include that would differentiate my course from others?
- What topics are required for certification or accreditation?
- What topics are important to be included as industry standard?
4. Set Goals
Now that you have gathered the ideas, you need to decide what you are actually going to include in the course.
There are two main approaches depending on your access to delegates:
TNA (Training Needs Analysis)
- If you have access to your delegates, for example they are part of an organisation, you can conduct a Training Needs Analysis, where you identify skills gaps and then proceed to design your course to address those gaps. The process is straight forward, but involved. If you are interested to know more, this is explored in detail in Lesson #4 of the free Train the Trainer Self-Study Course.
Public Course Design
- Alternatively, you may not know who will attend your course and you may not know what they already know. For such cases you need to conduct your own research on the expected target audience. You must consider what type of students benefit from your specific course and why they should attend it.
Either way, the aim is to have a detailed idea of the kind of delegates you expect to have in your course. This profiling is crucial!
I cannot stress this enough. Many courses fail precisely because they’ve skipped this important step. There are a dozen more steps in this guide that follows from here; But I can assure you that if you skip this step, you will find yourself redoing everything that follows.
Why is this step so important? Let me share with you delegate’s top complaints after attending a course they don’t like:
- The course didn’t have anything to offer me. I already knew most of the stuff.
- The course was complicated, I felt rushed throughout.
- The course covered too many topics, it was hard to keep up or examine anything in enough detail.
- The course was boring.
- The course consisted of outdated content that doesn’t help with my job or what I want to do.
These complaints all go back to a fundamental mismatch between what the course is offering and what the delegates want. If you don’t know your delegates, or don’t have an understanding of what they already know about the course topic, you will fail to deliver a satisfying course. No question about that!
Learning Objectives
Now that you know your target delegates and what you think they need to learn, you can define your learning objectives. This can be as formal as you want it to be depending on your course. If you have assessments and certification, then a formal definition of objectives is necessary so you can measure performance systematically. Otherwise, there is no point to spend a significant amount of time formulating a sentence for an objective when you could instead spend your time working out how to get the delegates to the “aha” moments, which I will explain in the next section.
Example Case Study
Broad Learning Objectives Formulation:
- Operate your DSLR camera functions to set aperture, f-stop, shutter speed, and ISO sensitivity
- Set up crest lighting, fill lighting, back lighting, paramount lighting and Rembrandt lighting
5. Define the “Aha” Moments
An “Aha” moment is a lightbulb moment—it is when something clicks or the penny drops. All of these phrases capture the concept that when you are teaching you are moving towards this critical lightbulb moment when some deeper understanding takes place.
I consider this concept as one of the most powerful ways you can use to turn your training course from average to superb. This is because the vast majority of courses are not designed with “aha” moments in mind and instead focus on passing tons of information. That’s all they seem to do: slide after slide and talk, talk, talk. This is boring and tedious and 90% is forgotten shortly anyway. Why bother!
Focus on “Aha” Moments to Avoid Lecturing
An information rich course is susceptible to become a one-way lecture. As you know by now, this one-way approach is to be avoided at all costs. Instead, you want to be a facilitating trainer.
You should focus your design to navigate the delegates through a series of “aha” moments. As they understand one concept after another and get to apply them in practice, the delegates will come out at the end more knowledgeable and skilled.
A crucial point is to know that those “aha” moments are much more powerful than focusing on passing lots of information. When people ‘get it’ they become much more excited and energetic about the topic. They want to learn more. They become fully engaged. They can absorb a fair amount of information just because they are excited to see things in a new way.
BOX: Always remember, an “aha” moment gets people engaged and is not easily forgotten; this is why it makes it so powerful to use when running training courses.
Example Case Study
By the end of this course I want them to experience this critical “aha” moment:
- I want them to fully understand the relationship between aperture, shutter speed and ISO; that there is always a compromise to be made. They will gain something and will lose something as they consider the exposure triangle. So delegates should learn to have a strategy for every shot and what they want to get at the expense of something else before pressing the shutter button.
6. Sequence the Content
Now that you have defined what you want your delegates to learn, you are ready to sequence your content. What is the best way to approach this? Would you just start from some theory and work your way onwards? Would it not be better to systematically follow a structure?
The following 4-step process can help you sequence your contents.

Remember, first and foremost, you are a facilitating trainer; your role is to assist the students in the learning process. Walk the delegates through the following phases:
Phase 1: Experience Certain Experiences
Expose delegates to a certain experience and help them receive information.
- Get them to go through a roleplay, case study or group exercise
- Familiarise them with the basic functions of a tool
- Get them to see how experts use the tools and what can be achieved
Phase 2: Think About the Experience
Delegates get to process the information they received in Phase 1 and think about it. They must analyse their experience. The aim is to prepare the delegates for key learning points that they will cover in the next two phases.
- Get them to discuss the experience in groups
- Get them to present a summary of discussions to others in the class
Phase 3: Generalise the Experience
Delegates get to interpret the lessons in phase 2, understand their meaning and establish principles.
- Get them to work on a project and deliver results
- Get them to demonstrate and measure their performance against an ideal
- Ask them to make something based on what they have learned and receive feedback from you and other delegates
- Ask them to research and read up on the topic to form a more general understanding of the area. Ask them to report their findings to other delegates.
Phase 4: React to Experience and Implement
Get delegates to connect what they learned to their role. If they cannot see the connection, they will not use it so this is an important phase.
- Get them to express how useful the techniques are in relation to what they need
- Get them to draw up actions on how they would use the lessons learned
- Get them to plan these actions and commit to reviews
That’s it. As the saying is, “ask the right questions to get the right answers.” Every time you are wondering what to include or not to include, consider these four phases. It’s a roadmap that helps you see what kind of content might be missing.
At this stage, you should also consider how to sequence the topics; in essence you need to decide what needs to come before something else.
Example Case Study
In the case study of photography, delegates need to know how to use the basic functions of the camera first, before moving on to more advanced ones. For example, if they don’t know about shutter speed and its effect, you probably don’t want to move on and teach about spot metering. It makes sense to leave it for later.
7. Design Content That Makes Them Excited
Have you ever attended boring courses? Almost everyone has. Did you learn much? Probably not. Did you tell everyone that it was terrible? Very likely.
Boring courses are my number one nemesis. And they are everywhere! Blink while you are booking courses, and you can easily end up attending one!
When the course is boring, you lose engagement straight away. No engagement means no learning.

Now, this is fun….
To make exciting courses, you cannot just rely on your charm and entertainment skills. These will only go so far. What works best is deeply interesting and exciting content. The time to come up with such exciting content is during the design stage—now.
When designing a course, ask yourself the following:
- If I was going through the course I have put together, on a rating of 1 to 5, how excited would I be as an attendee?
- What can I include that delegates will look forward to?
- Can I make one more area even more exciting?
- Which area is the most boring topic when they are susceptible to disengage? How can I turn this into something exciting?
Example Case Study
Examples of what you can include in a studio photography course to make the it exciting:
- Bring a sophisticated top of the range camera and show off its features to get students excited about the possibilities ahead as their photography improves.
- Show off studio equipment to makes them interested in a variety of technologies used to capture great shots.
- Invite a colleague that specialises in studio lighting to demo setting up various dramatic studio lighting much like those used in cinematography and successful movies.
Note: A photography course by its nature is quite exciting anyway, so the above is given only as an illustration of using the technique. You should aim to make any course exciting, be it on health and safety or an update on a mundane government policy. There is always a way if you think hard enough, I promise!
8. Design Exercises
In my view exercises come to define a training course. Without exercises, not much is learned or remembered. They might as well just read a book; why bother with the time and expense of attending a face-to-face course.
Here is something for you to think about. The moment you get excited about putting a course together, force yourself to think of what exercises you will give to your delegates. It is an efficient test to carry out early on to see if your course works. If you don’t have any good exercises, you will struggle with the design process.
There are three types of exercises to consider:
Custom Designed
- These are technical exercises specific to your course topic. Most often, you will need to design them yourself. This gives you the opportunity to make your course unique.
Exercise Library
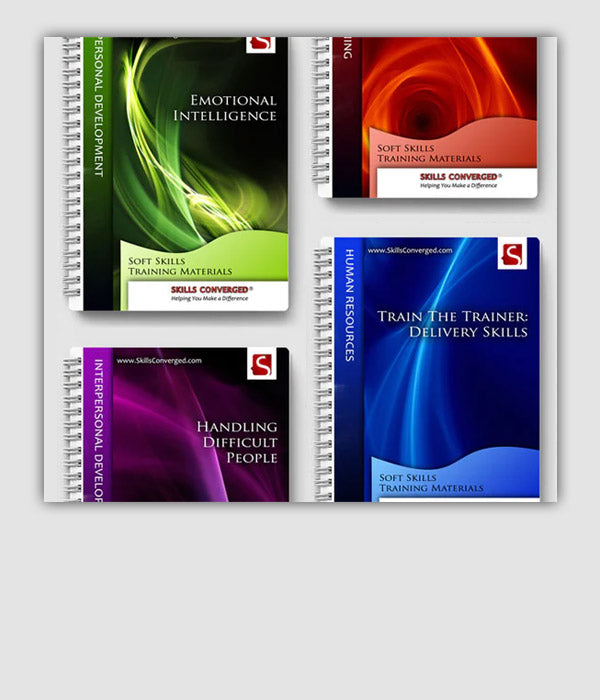
- You can obtain exercises from online exercise libraries or reference books. For example, you can find hundreds of exercises on soft skills, management and team building on Skills Converged website for free. Browse them using the links below:
Library of Exercises
Emotional Intelligence Exercises
Exercise Pattern
- You can use exercise patterns or templates to create your own version. A pattern is a proven structure of an exercise that works but can be applied to any topic. You just have to modify it to suit your needs. Here is an example.
An Example of Exercise Pattern
- Divide the delegates into groups.
- Get them to discuss the pros and cons of using Method A vs. Method B (you can choose what these are).
- Get them back and ask them to share a summary of their discussions.
- This is a simple but powerful exercise in many situations. I suggest you browse exercise libraries and as you come across a pattern you like, make a note of it. The exercise patterns can come handy when you need to design a custom technical exercise.
Example Case Study
A few exercise ideas for the photography course. You will then need to work out the details of each exercise, any equipment needed, settings used and how performance is measured.
- Take a portrait shot in crest lighting with soft background focus
- Take a portrait shot with Rembrandt lighting
- Take an overexposed shot to isolate a subject from the white background
What Are You Aiming to Achieve with an Exercise
What is the point of an exercise? Why would humans need an exercise? As you probably have experienced already, much of learning consists of trying, measuring and comparing. When we try, we could fail, and that’s exactly the whole point. It is the failure that helps you compare your performance with the ideal and using feedback to improve your performance in the next iteration.
This is a universal concept for learning and when running training courses you must be keenly aware of this trait of the human mind. Your job is therefore to make your learners fail—in a controlled way—and help them correct their performance based on an ideal. If failure is not allowed or even frowned upon, it is considered unsafe and is avoided, learning may not take place. It’s that simple!
I like to repeat this point again, because it is so important. You must design “failure” into your course. Failure helps people see what they should be doing. This is why a course with no exercises is not going to do much because there is no opportunity for delegates to fail.
The same goes if you include exercises but the environment is so unsafe and punishing that delegates don’t dare to try because they are scared to fail. If they cannot fail, they cannot learn!
The principle is captured beautifully by Michael Jordan, the greatest basketball player of all time:
“I’ve missed more than 9,000 shots in my career. I’ve lost almost 300 games. Twenty-six times I’ve been trusted to take the game-winning shot and missed. I’ve failed over and over and over again in my life. And that is why I succeed.”Michael Jordan
An exercise is an opportunity to make people feel they can progress forward and achieve results. It creates optimism. A one-directional lecture format with no exercises, in contrast, overwhelms people and makes them pessimistic.
Again, the reason I emphasise this so strongly is that there are many courses out there failing precisely because they don’t provide an opportunity for an exercise that makes people grow. An exercise is not just letting the delegates have a go; it needs structure so they can fail, learn from that failure by comparing to an ideal and use the feedback loop to improve performance.

9. Design Assessment
Next task is to decide how you are going to assess your learners. This highly depends on the nature of the courses you are providing and also the subject matter.
The key point is that assessment should be designed in line with exercises. You cannot assess someone unless they have gone through exercises and, crucially, had a chance to fail. Remember, as I stressed on this earlier, learners must be able to fail safely in a supportive environment before they are tested.
I see time and again that courses are designed with minimal exercises and the assessment is sometimes taken as an exercise itself. This is terrible because a learner that fails in that kind of assessment, with no opportunity to have practiced before, can be completely put off from the topic. Depending on the training situation (such as organisational training) this can be quite costly.
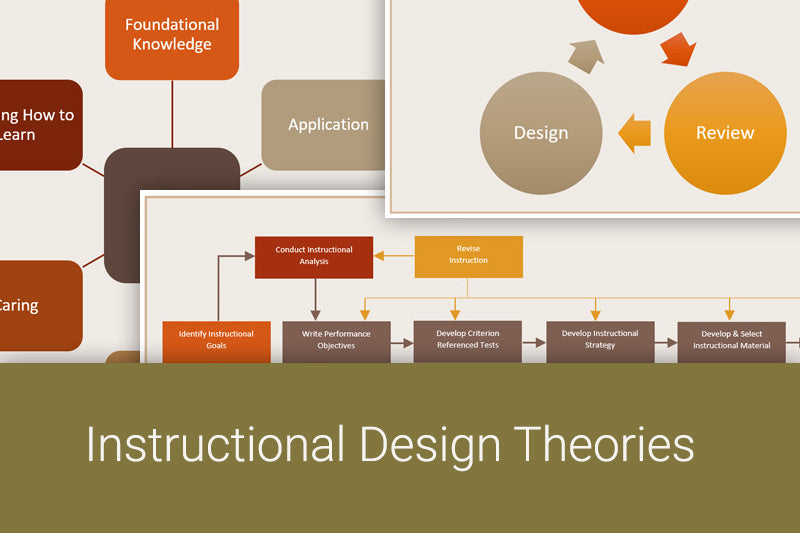
10. Address Learning Styles
A critical point to consider when designing your course is that you are not designing it for only one type of learner. People learn differently and you must account for this in your course design process. I covered this earlier in the article, that it is important to profile the delegates based on their needs and learning styles before you think about what to put into the course.
Learning styles allows you to categorise learners into a few types and use training constructs to address their learning needs.
Now, there are numerous theories classifying learning styles with researchers claiming how one is better than another. Which system to apply is of less importance than applying it. In my experience, most trainers tend to be unaware of this during everyday training.
I have my own preferred classification of learning styles which I cover during my online train the trainer course and my instructor-led train the trainer course. I find this system quite practical and easy to use in everyday training. My students are always amazed by its elegance and simplicity and quite often this becomes the highlight of the whole course.
Below I have listed a few of the common learning style classifications. Most systems tend to classify people into four distinct types. Explore the following to learn more:
Learning Styles Classification
Divergers, Assimilators, Convergers, Accommodators
Honey and Mumford Learning Styles
Activists, Reflectors, Theorists, Pragmatists
Concrete-Sequential, Abstract-Sequential, Concrete-Random, Abstract-Random
Innovative, Analytic, Common Sense, Dynamic
11. Match the Topics and Exercises to the Length of Time
Now, that you have figured out the exercises and what can make learners excited, you will need to think of timing and how you can fit them all into the course. There is no point planning for all sorts of cool exercises if you don’t get a chance to run through them.
While sequencing and making decisions, I want you to be aware of the following:
Decide on the Overall Length and Release Time
- Do you have enough time for what you intend to teach? May be you have a lot more content than it fits in. This is the time to rethink your strategy. May be you need to have a two-day course rather than a day-long course. May be you don’t have enough content. You also have to see when to start the course and when to finish it. Read the guide on when to run a course for more details.
Don’t Plan to Include Something for Every Single Minute
- Leave out time in the middle and at the end of the course. In my experience, things always take longer. It is easier to end up behind schedule than to be ahead. So allocate pockets of time that are completely unscheduled and use them to catch up if behind.
Manage Energy
- Delegates can get tired. There is only so much they can pay attention to and take in. Just because you have five exercises that are interesting, doesn’t mean that they will have the energy and willpower to go through them all. Too much content leads to fatigue. Quite often, you will have to make a choice and compromise on some of them.
- Consider using energisers throughout the course, especially when energy levels are low, for example after lunch, to keep the delegates engaged.
12. Design the Training Environment
Now that you know about your learning objectives, the “aha” moments, the content you want to cover, the exercises you want to run and how you want to keep them engaged, you can think of the training environment. What equipment do you need? What table layout works best? What should you do about the elements such as lighting or the free physical space?
This applies even if you are offering an in-house course. You must share your specific needs with the client to make sure the training environment is set in a way that maximises learning. It is your responsibility to get this communicated, because you cannot expect the client to know what you need for your specific training course. Here is an example of the in-house train the trainer course we offer.
Design the environment so that it:
- Helps you run your exercises
- Increases interaction between delegates
- Generates curiosity and interest in the course content
- Helps minimise distractions
Example Case Study
Based on your exercises you may decide that you need to have:
- Several tables and chairs that can be easily moved and stacked out of the way to clear up the area for shooting the model
- A partitioned area for the model to change
- Extra backdrops with specific colours to create variety in shots
- Extra lighting to showcase a series of lighting modes
- The fancy camera you want to show off to get delegates excited
- Gels for various light effects
- Blackout the windows so that the only source of light is from studio lights. Helps learners not get confused by multiple sources of light that change during the day
13. Design or Obtain Training Materials & Visual Content
You are now ready to embark on perhaps the most time consuming part of course design: designing the training materials. Designing a course from scratch requires substantial time spent on research and design.
By using training materials you get to follow a formal and proven structure that can significantly help you avoid problems, such as running out of time, missing critical topics or ending up with resisting learners.
Depending on your course, your training materials would have various components. Naturally, a sports course is unlikely to need slides whereas a course on learning software would certainly require some handouts or workbooks.
Since designing training materials can take a significant amount of time, you could also consider purchasing them. If the training materials are good and editable, you can then modify them to suit your needs. Here at Skills Converged we offer an extensive range of soft skills training materials for you to use.
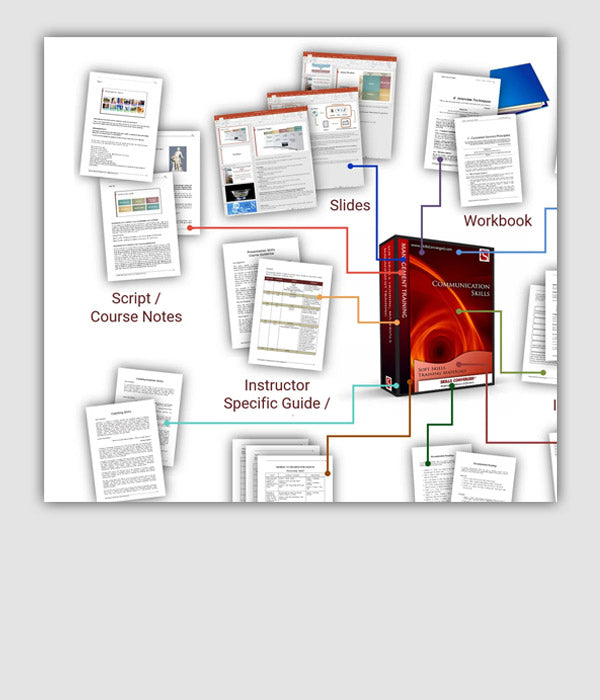
The usual components of training materials are:
- Workbook
- Slides / Images / Videos
- Handouts / Forms
- Props / Tools / Gadgets / Equipment
- Software
- Trainer Script
- Agenda and Course Specific Instructions
- Reference Books / Supplementary Resources

Example Case Study
For the photography course you may need to prepare the following:
- Trainer script
- Examples of interesting images of portraits taken by photography masters around the world
- 3D Visualisation of different lighting shown in video
- Video of using various camera settings and what they do
- Handout for setting up the studio lighting based on the desired style
- A 10-page handout that includes a summary of what is covered in the course
- An assessment form used where delegates need to assess each other’s photos
14. Design Leading Questions
Now we get to the trainer script. What are you actually going to say throughout the course? The most important point I want you to think about is that you are a facilitating trainer.
Being a facilitating trainer means you must help delegates discover and lead them to the “aha” moments. You cannot just constantly talk. What should you do then?
You should ask questions and lead learners to answers.
Unfortunately, this is not as straight forward as it sounds and you certainly cannot come up with them on the spot without preparation. I would say, designing leading questions is perhaps the most challenging part of designing any successful training course.
The reason is simple. It feels unnatural to do it this way. Let’s say I know something and I want to teach you about it. The natural thing to do is to tell you about it. It’s much harder for me to ask you questions, then lead you to the answer and make you think about it every step of the way. You can imagine though, that if I do it this way with leading questions, you are much more likely to remember the material.
Because it is less trouble, most trainers choose the easier path and just give the delegates the answers. I am always encouraging the trainers to ask more leading questions in their courses. My number one feedback in my train the trainer courses and when I am coaching is to beg trainers to ask more leading questions. I am rather tireless when it comes to advocating this crucial point!
Please do it. It does wonders. It will transform your training courses.
15. Design the Start of the Course
The beginning of a course is one of the most sensitive parts of a course. By having a solid start you will have a much easier time running the rest of the course.
Apart from designing the start, it is also quite important to deliver it right. In my train the trainer courses I always focus strongly on the early part of a course and get my delegates to practice this stage over and over again. The start is truly the foundation of the course, and once you get it right, everything else is much easier to handle.
At the start, aim to cover the following:
Establish Your Credibility
- Show the delegates that you are the right person to teach them.
Show Them Why They Need to Learn
- Excite them and relate the course to their needs to keep them engaged
Explain What Is Going to Happen in the Course
- Don’t keep delegates in the dark. Share with them what will happen and get them excited.
Break the Ice
- If you have a room full of strangers, they may remain uncomfortable and anxious until the ice is broken. You must therefore design the start to include icebreakers. Use our massive library of icebreakers for reference.
Generate Conversations and Discussions
- Get delegates to talk and share their knowledge and background. The sooner you know about what they know, the better. You can then plan the course accordingly.
Example Case Study
Include the following at the start in the course on studio photography:
- Get delegates talk about their photography experience
- Get them to share their best images. Ask them to bring a sample over before the course.
- Get them to talk about their cameras, how familiar they are with them and what they like and dislike.
- Get them to share their favourite portrait image taken by photography masters of the craft. Which photography artists they like the most?
- Get them to talk about other related areas in studio photography that they like.
16. Design the Ending of the Course
Finishing off the course correctly is also just as important. Consider the following guidelines when designing your content:
Make Sure Delegates Learn From Each Other
- Once they have gone through exercises, projects, etc., make sure the delegates have a chance to see each other’s works and give and receive feedback. I have seen so many courses where trainers abruptly finish the course after the last and most important practice session of the whole course. Why? This is a massive missed opportunity! Learners leave the course without knowing what other learners did or discovered during that last crucial part.
Make Sure You Summarise Key Points
- What you cover early in the course might be forgotten by the end of it. Review the lessons to make sure delegates got them. During the design stage, extract key learning points of the course and recap them at the end.
17. Formalise and Complete the Design
Now that you have all the components, you need to put them together to make a course. Consider the following:
Invest Time in Presentation
- A sleek well-polished presentation is certainly noticed and will improve the overall experience of your learner. If you have handouts, workbook, slides, etc, spend time to make them more visually interesting so that you can communicate more efficiently.
Prepare Your Design for Easy Delivery
- It is one thing to design a great course, it is another to deliver it. You must therefore walk through the content and visualise yourself delivering it. Don’t worry about not having the answers to some question someone may ask. Focus on the design and foundation and all will be fine. Beware of the ten wrong believes of training. There could be parts you need to rehearse more or just change altogether because they don’t fit with your preferred style of delivery. You need to address this during the design stage rather than dealing with them on the day.
Rehearse Your Delivery
- Finally, go through a minimum of three rehearsals. Each time, reflect, go back and change your design based on your performance. You almost always need to change your design after each rehearsal. Topics can take longer to cover, leading questions might need to be redesigned, parts may sound repetitive and boring, critical stories might have been left out and so on.
Course design is a journey, not a destination. Iterate, and then iterate some more. That’s what makes it fun. It is the going back and forth and the constant progress towards a higher quality content that makes the whole experience rewarding.
Keep at it, and you will end up with the best course in the market; one that you love to deliver over and over again and one that your delegates cannot stop thinking and talking about!
References
Meier, D. (2000) “The Accelerated Learning Handbook: A Creative Guide to Designing and Delivering Faster, More Effective Training Programs”, McGraw-Hill Education.

About the Author
Dr Ethan Honary is the founder of Skills Converged Ltd. A training consultant, researcher, author and designer with an aim to help trainers worldwide to improve training delivery and course design.
Table of Contents
The Scope of this Guide on Training Course Design
Systematic Course Design with an Example
1. Approach with Proven Training Techniques
2. Follow Course Design Methodology
7. Design Content That Makes Them Excited
11. Match the Topics and Exercises to the Length of Time
12. Design the Training Environment
13. Design or Obtain Training Materials & Visual Content
15. Design the Start of the Course
16. Design the Ending of the Course
17. Formalise and Complete the Design

Course Design Strategy
Available as paperback and ebook

Online Train the Trainer Course:
Core Skills
Learn How to Become the Best Trainer in Your Field

Train The Trainer Book
Available as paperback and ebook
The Most Similar Exercises & Articles to this in Order of Similarity Are:


Learn to Teach
Longform Train the Trainer Guides
All In-Depth Articles
CPD Accredited
Online Train the Trainer Course: Core Skills
Learn How to Become the Best Trainer in Your Field
Full Course Details
How to Reference This Article
Honary, E. (2019) "How to Design a Training Course", Skills Converged. Retrieved from: https://www.skillsconverged.com/blogs/train-the-trainer/how-to-design-a-training-course
1 comment
Emmy Irobi
The training course material that was shared is fascinating. Thank you.
Emmy Irobi
Leave a comment
All comments are moderated before being published.
This site is protected by hCaptcha and the hCaptcha Privacy Policy and Terms of Service apply.